Supported Devices
Pine64 (A64)
 | CPU Information Processor : AArch64 Processor rev 4 (aarch64) processor : 0 processor : 1 processor : 2 processor : 3 Features : fp asimd aes pmull sha1 sha2 crc32 CPU implementer : 0x41 CPU architecture: AArch64 CPU variant : 0x0 CPU part : 0xd03 CPU revision : 4 Hardware : sun50iw1p1 |
- About this device
- Introduction
- Needed stuff
- Preparation
- Installation
- Configuration
- Additional information
- Links
About this device
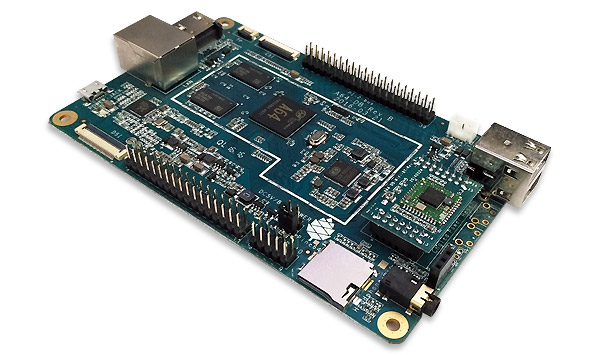
The Pine64 A64 is a powerful and affordable 64-bit single-board computer based on the Allwinner A64 SoC (quad-core Cortex-A53). It is well-suited for a wide variety of ARM Linux projects, from home servers to IoT and embedded development. CRUX-ARM offers support for this board, providing a minimal and flexible Linux environment.
Introduction
Since its introduction, the Pine64 A64 has become a popular choice in the ARM community thanks to its robust hardware, active open source support, and excellent expandability. CRUX-ARM actively supports this board, ensuring users can enjoy a lightweight, customizable Linux environment tailored for ARM64 systems.
To install CRUX-ARM on the Pine64 A64, the first step is to prepare a microSD card with the appropriate partition layout, install a compatible mainline U-Boot bootloader, and deploy the CRUX-ARM root filesystem.
This process involves creating a suitable partition scheme for the device, writing the U-Boot bootloader, copying the necessary kernel and device tree files, and extracting the CRUX-ARM system files onto the root partition.
The following sections provide a detailed, step-by-step guide to each of these tasks, ensuring a reliable and smooth installation experience. This approach leverages the simplicity and flexibility of CRUX-ARM, allowing users to build a minimal and efficient Linux system optimized for the Pine64 A64.
Needed stuff
- U-boot bootloader
- Extlinux config file
- Kernel
- DTB file
- Kernel modules
- Kernel headers (not strictly necessary)
- Official optimized release for the Pine64 A64
Before starting the installation, you will need access to a Linux computer, a microSD card with sufficient capacity for the CRUX-ARM root filesystem, and a card reader. The microSD card will host the bootloader, partitions, and the CRUX-ARM system itself. Please ensure you have the necessary permissions to write to the device and double-check the device path to avoid data loss.
Installation
1. Flashing the Bootloader
The first step is to write the bootloader (u-boot) to the microSD card. This is essential for the Pine64 A64 to initialize and start the operating system. Use the following command, replacing ${card} with the device path of your microSD card (for example, /dev/mmcblkX):
dd if=u-boot-sunxi-with-spl.bin of=${card} bs=1024 seek=8
Warning: Be very careful to select the correct device path for your microSD card, as using the wrong device could overwrite important data.
2. Partitioning the microSD Card
After installing the bootloader, you need to create a single partition on the microSD card. With current U-boot version (v2025.04) only one ext2 or ext4 partition is required. This partition will later be configured with extlinux and will contain the CRUX-ARM root filesystem.
You can use tools like fdisk or parted to create the partition. For example, using fdisk:
fdisk ${card}
Create a new primary partition (type: Linux, usually type 83). Write the changes and exit.
Then, format the partition as ext4 (replace ${card}1 with your partition name):
mkfs.ext4 ${card}1
Once the partition is ready, you can proceed to deploy the latest version of CRUX-ARM onto it and configure extlinux.
3. Verify CRUX-ARM release checksum
Before proceeding, it is crucial to verify the integrity of the downloaded CRUX-ARM root filesystem archive. This is done by calculating its SHA-256 checksum and comparing it to the official checksum provided by the source. This step ensures that the file has not been corrupted or tampered with during download:
sha256sum crux-3.8-arm64-pine64.rootfs.tar.xz
If the computed checksum matches the official value, you can safely continue with the installation.
4. Extracting CRUX-ARM rootfs into the created partition
Next, mount the previously created partition to a temporary mount point (e.g., /mnt) and extract the CRUX-ARM root filesystem archive onto it. This will deploy all necessary system files onto the microSD card:
mount ${card}1 /mnt
tar pxvf crux-3.8-arm64-pine64.rootfs.tar.xz -C /mnt
Ensure the extraction completes without errors before proceeding.
5. Prepare boot needed files
To enable the Pine64 A64 to boot CRUX-ARM, certain boot files must be placed in the appropriate directories on the microSD card:
- Create the extlinux directory inside /mnt/boot.
- Copy the extlinux.conf configuration file to /mnt/boot/extlinux/.
- Copy the Linux kernel image (Image) and the device tree blob (sun50i-a64-pine64.dtb) into /mnt/boot/.
Commands example:
mkdir /mnt/boot/extlinux
cp extlinux.conf /mnt/boot/extlinux/
cp Image /mnt/boot/
cp sun50i-a64-pine64.dtb /mnt/boot/
This setup allows the bootloader to find the kernel and configuration needed to start the system.
6. Finally uncompress kernel modules and headers
The last step is to extract the kernel modules and headers into the root filesystem. These components are essential for hardware support and compiling additional software:
tar pxvf modules-6.14.8.tar.xz -C /mnt
tar pxvf headers-6.14.8.tar.xz -C /mnt
After this, the microSD card will be fully prepared with the CRUX-ARM system, ready to boot on the Pine64 A64.
Configuration
After deploying the CRUX-ARM root filesystem, it is important to configure several key system files to ensure proper operation and customization of your installation. The following files should be reviewed and edited according to your needs:
- /etc/pkgmk.conf
- Configure build options and package directories for pkgmk, the package building tool.
- /etc/prt-get.conf
- Set up the package management frontend, specifying the ports tree locations and other preferences for prt-get.
- /etc/inittab
- Define system runlevels and configure console access, including serial console settings if needed (e.g., enabling serial login on ttyS0).
- /etc/fstab
- List all filesystems and mount points to be mounted at boot. Make sure your root partition and any additional filesystems are correctly specified.
- /etc/rc.conf
- Set system-wide settings such as hostname, keyboard layout, timezone, and enabled services.
- /etc/network.d/net or /etc/rc.d/net
- Configure your network interface settings to ensure connectivity at boot.
Review and adjust these files to match your hardware, network environment, and personal preferences. Proper configuration at this stage will ensure a smooth and stable experience with CRUX-ARM on your Pine64 A64.
Note: For detailed explanations and examples of these configuration files, please refer to the official CRUX Handbook. The handbook provides comprehensive guidance on system configuration and package management, which can be especially helpful for new users.
Additional information
Customization
Serial Console
To obtain serial access:
- Uncomment and change the line in /etc/inittab:
s1:2:respawn:/sbin/agetty 115200 ttyS0 vt100
- In the client side (using minicom here): it's needed to disable hardware flow control to get input events working.
Installing linux-firmware for Full Hardware Support
To ensure that all hardware components of the Pine64 A64 function correctly under CRUX-ARM, it is essential to install the appropriate firmware files. Many devices on the board, depend on proprietary firmware that is not included in the kernel by default.
CRUX provides a dedicated port, linux-firmware, which contains the necessary firmware binaries for a wide range of hardware. Installing this package is required to guarantee that all features of the Pine64 A64 are supported.
You can install the firmware package and its dependencies using the following command:
prt-get depinst linux-firmware
Note: Without installing linux-firmware, certain devices on the Pine64 A64 may not function properly or may not be detected at all.
This command will automatically resolve and install any required dependencies along with the linux-firmware package, ensuring that your Pine64 A64 hardware operates as intended
After installation, it is recommended to reboot the system to load the newly installed firmware.
Power Supply:
Always use a stable 5V/2A (or higher) power supply via the dedicated power input (not via micro-USB OTG) to avoid boot and stability issues.
SD Card Performance:
Use high-quality, high-speed microSD cards (A1 or A2 rated) to improve system responsiveness and reduce the risk of filesystem corruption.
Serial Console Access:
For troubleshooting, connect to the UART serial console using the EXP header. This is invaluable for debugging bootloader or kernel issues.
Mainline Kernel & U-Boot:
Prefer mainline U-Boot and Linux kernel images for better hardware support, security, and ongoing updates.
Thermal Management:
The A64 SoC can get warm under load. Consider adding a small heatsink to the SoC for sustained high-performance workloads.
GPIO & Expansion:
The 40-pin GPIO header is compatible with many Raspberry Pi HATs. Use the WiringPi for Pine64 or [libgpiod] for GPIO access from userspace.
Network Boot:
The Pine64 A64 can be configured for PXE/network booting with mainline U-Boot, useful for diskless setups or mass deployment.
RTC Battery:
Add a CR2032 battery to the RTC header to maintain the system clock when powered off.
Links
https://linux-sunxi.org/Pine64
https://linux-sunxi.org/Pine64-LTS#Serial_port_.2F_UART
https://source.denx.de/u-boot/u-boot/blob/master/board/sunxi/README.sunxi64
https://wiki.pine64.org/
https://wiki.pine64.org/wiki/U-Boot
Reference on how we build U-boot/Kernel